Git integration
Overleaf's Git integration is a premium feature. Overleaf premium features are available to participants in Overleaf Commons, members of group subscriptions, and owners of individual subscriptions. Git integration is available on Overleaf Cloud and Overleaf Server Pro (version 4.0 and later).
What is the Overleaf Git integration?
Overleaf's Git integration allows you to obtain a Git URL from your Overleaf project and treat it like a remote Git repository (repo). You can clone your project to a local Git repository and work on your project locally, pushing changes to your project from your local machine and pulling updates that are occurring in Overleaf's online editor to your local repo.
This allows you to work on your project locally for those times when online work is not feasible, to use a different local editor of your choice when working on an Overleaf project, or to easily add outputs from other local software to your Overleaf project.
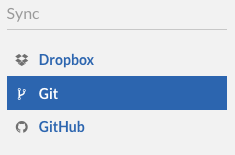
You can obtain the Git URL and clone command for your project from the Git option in your project's Overleaf menu.
How to authenticate when using the Git integration
When you perform a Git operation such as clone, pull, or push to your remote Overleaf project, you will be asked to authenticate.
To access your Overleaf project from Git, you must use Overleaf token-based authentication. For step-by-step instructions see: Token-based authentication.
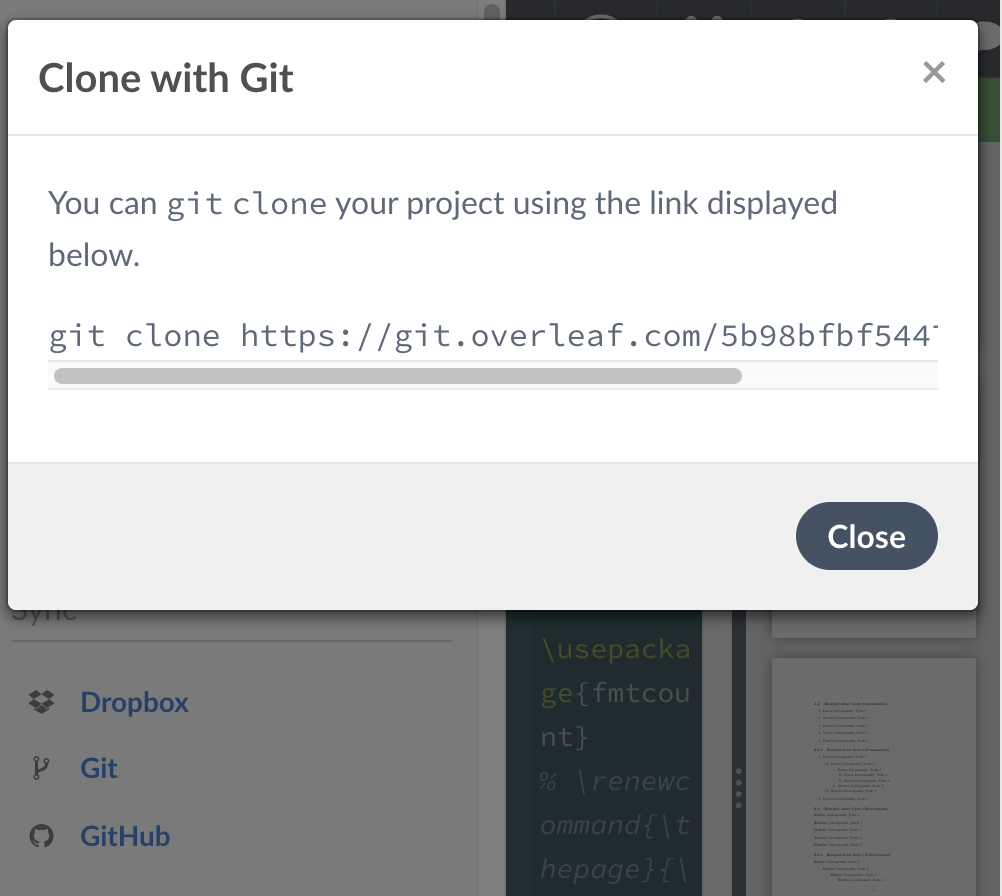
Cloning your project as a local repository
From the Menu within your project, you can select Git from the Synchronization options. This will bring up a dialog showing the git clone command to use when creating your local repository.
Alternately, you can find the Git url from the project URL (the URL in the browser address bar when you're in a project).
Overleaf Cloud
If you're using Overleaf Cloud and your Overleaf project URL looks like:
https://www.overleaf.com/project/1234567
Then the Git url to use to clone the project will be
https://git.overleaf.com/1234567
And the command used to clone the project into a local Git repository will be:
git clone https://git.overleaf.com/1234567
Note: you may be prompted for a username and password. Please see Git integration password authentication
Overleaf Server Pro (version 4.0 or later)
Note: The Git-bridge integration is not enabled by default in Server Pro. Please see our Git Integration guide for instructions on how to enable it.
If you're using Overleaf Server Pro and your Project URL looks like this:
https://<SHARELATEX_SITE_URL>/project/1234567
Then the Git URL used when cloning the project will be:
https://git@<SHARELATEX_SITE_URL>/git/1234567
And the command used to clone the project into a local Git repository using the Git command line will be:
git clone git@<SHARELATEX_SITE_URL>/git/1234567
Note: You may be prompted for a password. Please see: Git integration authentication tokens
Creating an Overleaf project from an existing Git repository
If you have an existing repository, you can add an Overleaf project as a remote repository. There are a few commands below that you'll need to run to get things started. Please note that Overleaf only supports one linear history for each project. The Git integration enforces this limitation by limiting the number of branches to one. That one branch is currently hard-coded to be called master.
- First, we assume you have git repository on your computer in a folder called
my-paper. (It might also be hosted on GitHub, GitLab, or Bitbucket, etc., but you need to have it cloned locally, too.) - Create a new project on Overleaf. Since any content in the project will be overwritten, use the 'Blank' project option when creating this project and delete the
main.texfile in Overleaf. - Find the Git URL for the project (see above).
- Add the Git URL for the project as a remote in your local project.
$ cd my-paper
$ git remote add overleaf <GIT-URL>
(Be sure to use your own link, not the example link.)
- Pull the latest content from the Overleaf project and merge it into your master branch.
$ git checkout master
$ git pull overleaf master --allow-unrelated-histories --rebase=false
- Push your project to Overleaf.
$ git push overleaf master --set-upstream
If you want to use a different branch name locally, e.g.
my-branch, you can push your changes with an alias:$ git push overleaf my-branch:master
- Visit the project on Overleaf. Your changes should be there. (You may have to open the Overleaf Project menu to find which file has been set as the main document file, and possibly change this initial selection.)
Git commits and the Overleaf Git integration
Overleaf has an internal History system that allows simultaneous collaboration within an Overleaf project. This isn't the same as Git, so the Overleaf Git integration is essentially a translation from Overleaf's history and versioning mechanism to Git. This allows many Git-enabled use cases, but it doesn't allow you to work within Overleaf as if it was a complete Git implementation.
When are commits created?
When you issue a pull or fetch command, if no commit exists for the current project state, a new commit is created dynamically. When you push files from your local repository to the Overleaf remote, a commit is created at that time as well, which will be visible in any future clones you make of the Overleaf project. When you or others are editing in Overleaf, commits will not be automatically generated until needed.
Forcing commits
If you'd like to force a commit to be created at a particular point in Overleaf history, you can do so by labeling a version in the Overleaf history. The labeled version will get its own commit hash even if you don't do a git pull right away. A commit will only be created from a label if there have not been any other commits made more recently than the Overleaf history point that is being labeled.
Tracking authorship
The just-in-time nature of commits from the Overleaf Git integration means that if there have been multiple changes on the Overleaf side before a commit is generated, the author of the most recent change will be listed as the author of the commit.
When working with coauthors, it is helpful to create a label (generating a commit) after each collaborator has completed a significant update - this creates a sequence of commits visible in Git that most closely reflects the changes that are happening in Overleaf.
Synchronizing with another remote
Overleaf's Git integration allows your Overleaf project to act as a remote repository for local repositories. However, you may wish to synchronize your Overleaf project with another remote, hosted on GitHub, GitLab, or another Git hosting service.
If you're synchronizing your project with a repository hosted on GitHub (https://github.com/), you may wish to use Overleaf's direct GitHub synchronization feature.
If you are synchronizing your project with GitLab, GitHub Enterprise, or another host, you can use the Overleaf Git integration to set up an intermediary local repository.
Following the instructions above for cloning your project or linking a project to an existing repository, you will have a local repository that can push/pull changes from Overleaf. You can then add a second remote to this repository which points to your hosted repository. Your local will need to have two remotes so that it points to both your Git host and the Overleaf project.
Although there will be no direct connection between the Overleaf project and your Git repository, this will allow you to keep them synchronized.

Add an Overleaf project as a Git Submodule
Each project on Overleaf acts as an independent Git repository, but if you want to organize several such projects into one Git repo, you can add the repo for each project as a Git submodule in the usual way. You can then push and pull each submodule repository to/from Overleaf individually and still have them collected together as submodules into a larger project.
Note: While Overleaf projects may be submodules within another repository, Overleaf projects themselves cannot contain other submodules.
Known Limitations
Branches: The Overleaf Git system does not support branching.
Symlinks: The Overleaf Git system does not handle Symlinks well. A symlink can be pushed into an Overleaf project, but will be converted to a regular file, and will over-write the local symlink the next time the project is pulled.
Tags: The Overleaf Git system does not support tagging.
File permissions: The Overleaf Git system does not preserve execute permissions. To work around this, you can run git config core.fileMode false in your local clone of the repository. Then you can reset the execute permissions on any affected files. This way they won't be modified again with subsequent Git operations.
Git LFS: Overleaf projects do not support Git Large File Storage.
Git submodules: Overleaf projects can act as Git submodules within other repositories, but cannot contain other Git submodules. To reference files from other projects, it is suggested to use the add from another project feature.
Renaming folders: If a user renames a folder, and pushes the change to Overleaf, the project will retain an empty folder with the old name, in addition to the new folder. (For example, renaming images/ to img/ will leave two folders in the project: img/ containing the image files, and images/, which will be empty. This can cause problems when a user renames a folder, and creates a new file with the same name as the old folder, in one commit. The Overleaf Git system will reject this commits. In this case we recommend splitting the commit up into two parts, and deleting remaining folder.
Renaming files and moving files: A file rename in your local repository becomes a delete and create on the Overleaf side. This can result in loss of metadata associated with a file on the Overleaf side, causing the deletion of tracked changes and comments. It is not recommended to move or rename files on the Git side that have Overleaf tracked changes or comments.
Track Changes and Comments: Unfortunately, pushes from Git to Overleaf can result in the loss or displacement of track changes and comments; consequently, we do not recommend mixing active use of Git and the use of track changes and/or comments.
Troubleshooting
Repository not found errors
If you are seeing a Repository not found error, it's likely that the wrong URL is being used. The correct URL can be found by clicking the Git option in the Menu within the project. For Overleaf cloud, Git integration is a premium feature, so it will only be available if the project owner has a paid subscription to Overleaf or has been granted access to the feature (by participating in early beta testing, for example).
Authentication failed errors
Please see the troubleshooting instructions for Git integration authentication tokens or Git integration password authentication depending on which login method you are using.
Rate limits
Git Bridge rate limiting does not generally occur when Git operations are executed manually. Some Git clients can be configured to attempt to automatically poll remotes for changes, which can lead to rate limiting errors some cases. Generally disabling any automated polling or reducing the frequency of Git operations should solve these issues.
Failure to push references
A failure to push some reference to the remote project can be caused by exceeding the file size or number limitations of a project or by including unsupported file types (symlinks, or LFS, for example.) Please review the known limitations listed above to identify any problem files in the commit.
In some cases, increasing the postBuffer setting can address failures to push references from your local repository to the Overleaf project.
First, you can check your current setting with the command:
git config http.postBuffer
If there's no output, that means that the default value of 1MB is used.
Next, try the command
git config --global http.postBuffer 10485760
which will set the value to 10MB instead.
Now you can try pushing the commit (to either the original project or the new one). If that doesn't work, you can return to your previous setting, or remove the setting with:
git config --global --unset http.postBuffer
Timeouts
Git commits that include a large number of changes can potentially lead to timeouts. If you encounter a timeout, please attempt breaking the commit into smaller changes. If the problem persists, consider setting the postBuffer to 10MB as described above.